Self-Hosted Security Cameras
Clouds are Slow
Don’t waste time with a cloud-based security camera system. They are painfully slow and charge fees for everything. You are locked into a single vendor and their whole closed ecosystem and then one day, they obsolete your cameras and you are left with perfectly good hardware that does nothing.
You can build your own security camera system that will work much better and be much cheaper than anything Ring, Nest, or Arlo can offer.
My current setup affords the following benefits:
- Fully local and self-hosted
- 24/7 recording
- Object detection and notifications
- Remote access
- No cloud companies to go out of business and obsolete my whole setup
- No vendor lock-in
Here’s a quick rundown of my current home security camera setup:
Hardware
- 4x Reolink RLC-410 4k Cameras
- TP-Link Managed PoE Switch
- Synology DiskStation DS1019+ NAS
- 2012 Macbook Pro running Archlinux (btw)
- Coral Edge TPU (more on this later)
Software
Contents
Camera Selection
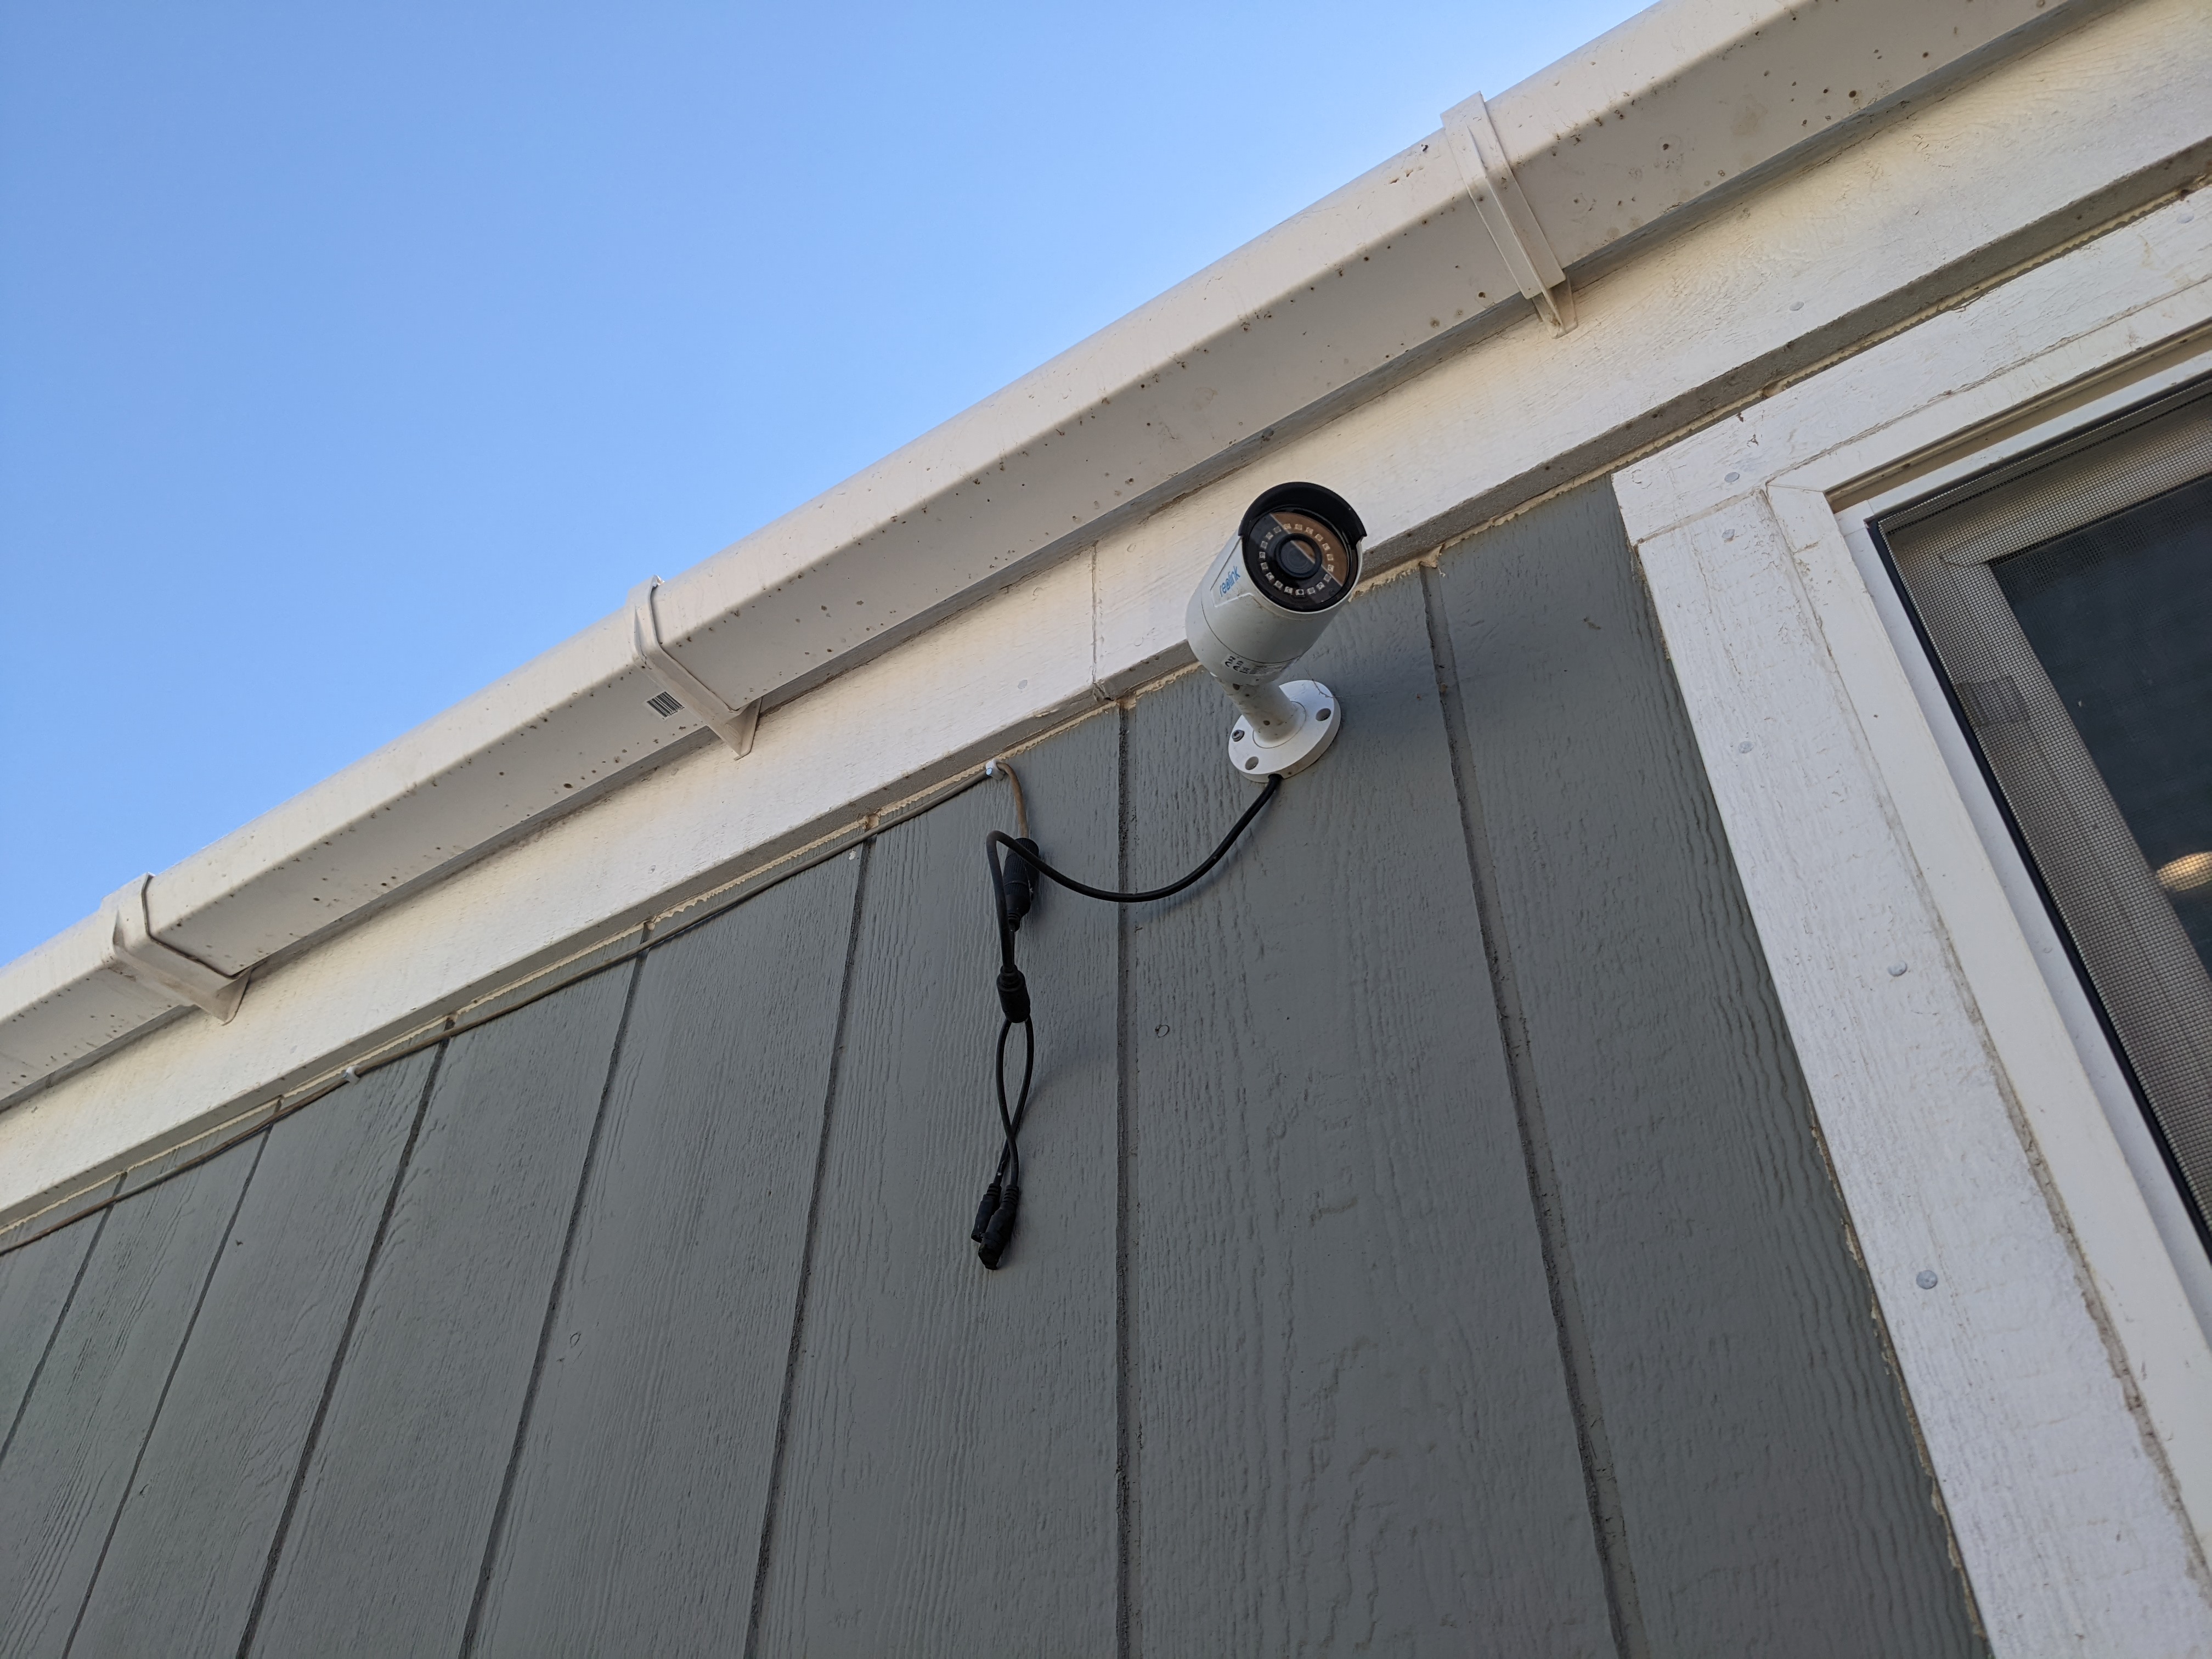
The cameras I’m using are PoE (Power over Ethernet) IP cameras meaning they are wired but you only need to run one wire to them for both power and the video feed. A CAT-5 cable connected to a PoE capable switch is all you need. This setup can be achieved with WiFi IP cameras as well. I actually have one Amcrest cam in my setup that is connected via WiFi. But I like the PoE approach because I probably am going to run a cable to the camera anyway so I don’t have to charge batteries every 2-3 months so I might as well just run ethernet.
Anyway, as long as the cameras appear on your network and they publish some kind of video stream (RTSP, RTMP, HTTP) stream, you should be good to go.
Frigate and Home Assistant
Frigate is the heart and soul of the whole operation. It’s a killer little app that really blows any other open-source NVR options out of the water. It handles monitoring the camera streams, detecting motion, and running object detection. It can be configured to record 24/7 and create separate clips when an object is detected. Additionally, it can use an external Tensor Processing Unit (TPU) to make object detection much faster and can free up processor load.
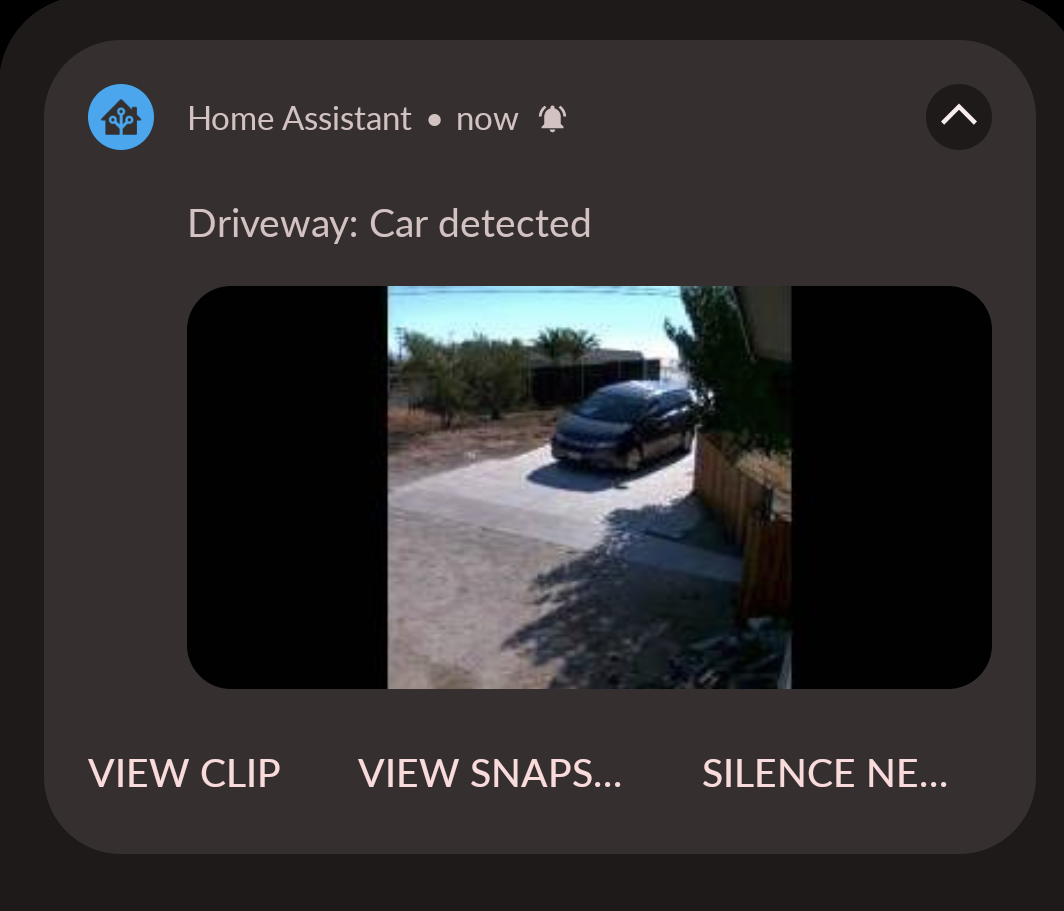
Frigate can be used on it’s own but you’re missing out on a lot of features if you don’t integrate it with Home Assistant. Once the two are talking to each other, you can set up automate your cameras and receive notifications on your phone when objects are detected. This is actually my favorite part because the notifications can include an image and description of what was detected. So when someone drives down my driveway, I get an almost instant notification with an image of what’s going on. Back when I had Arlo cams, I’d get a notification of motion, have to wait 5-10 seconds for the app to open and the stream to buffer only to find the UPS guy just barely walking back out of the frame.
Overall, the app is really great. I get nearly zero false positives because the object detection is well tuned and it rarely misses an event.
Setup
Cameras
Mount the cameras wherever you want and run ethernet to them. Plug the switch into your router and they should appear on your network. There’s not much to this step except I strongly recommend blocking the cameras’ internet access. These are cheap cameras with cheap firmware and they phone home a LOT. Save yourself some worry and close them off to the outside world. This should be configurable from your router. I’ve got OpenWRT running on my router and it’s pretty straightforward to firewall certain devices on the network.
Home Assistant
I tend to run most things in Docker since it’s real easy to keep track of configuration and you pretty much never fall into dependency hell. So getting HA running is pretty straightforward. I like Docker Compose so this is my simplified docker-compose.yml file:
version: '3.3'

services:
    app:
        restart: unless-stopped
        environment:
            - TZ=America/Los_Angeles
        volumes:
            - './config:/config'
        network_mode: host
        image: 'homeassistant/home-assistant'
Create a directory, put this in a file called docker-compose.yml in that directory and run docker-compose up -d. This will pull the Home Assistant image and run it. You should have Home Assistant available at http://localhost:8123
Frigate
MQTT
Before running Frigate, you will need to install and run an MQTT broker. I’m using Mosquitto but RabbitMQ should work too. I installed the one available from the Arch repo but I’ve run this in docker in the past as well and it worked out fine. I used the default configuration. You’ll need to create a Frigate user once Mosquitto is installed:
mosquitto_passwd /etc/mosquitto/passwd frigate {A_PASSWORD}
Keep the username and password for later. Once you’ve added the password to the password file, start the server with our old friend, systemd.
sudo systemctl start mosquitto.service
Frigate Proper
Again with the Docker. This one is pretty simple as well:
version: "3.9"

services:
  frigate:
    container_name: frigate
    privileged: true # this may not be necessary for all setups
    restart: unless-stopped
    image: blakeblackshear/frigate:stable-amd64
    devices:
      - /dev/bus/usb:/dev/bus/usb
      - /dev/dri/renderD128 # for intel hwaccel, needs to be updated for your hardware
    volumes:
      - /etc/localtime:/etc/localtime:ro
      - ./config.yml:/config/config.yml:ro
      - /mnt/nvr/frigate:/media/frigate
      - type: tmpfs # Optional: 1GB of memory, reduces SSD/SD Card wear
        target: /tmp/cache
        tmpfs:
          size: 1000000000
    ports:
      - "5000:5000"
      - "1935:1935" # RTMP feeds
    environment:
      - FRIGATE_CAM_USER=${CAM_USER}
      - FRIGATE_CAM_PASSWORD=${CAM_PASSWORD}
There’s a few configuration options here that will be hardware specific. I’m running this on an older Macbook Pro with an ancient Nvidia card. Newer hardware can offload some of the video processing work to the GPU with the runtime: nvidia configuration option. Read the Frigate docs for more info on that.
The key volume mounts here are config.yml and the /media/frigate directory. The former is the configuration file you will use for getting Frigate setup. The latter is where all media will be stored. Most of the rest of the configuration options here I just copied and pasted from the docs.
Configuration
As stated mere moments ago, Frigate looks for a config.yml file to get going. Here’s a slightly minimized version of mine:
detectors:
  coral:
    type: edgetpu
    device: usb

mqtt:
  host: 192.168.0.100
  port: 1883
  user: {FRIGATE_MQTT_USER}
  password: {FRIGATE_MQTT_PASS}

cameras:
  Driveway:
    ffmpeg:
      inputs:
        - path: rtmp://192.168.0.152/bcs/channel0_sub.bcs?channel=0&stream=0&user={FRIGATE_CAM_USER}&password={FRIGATE_CAM_PASSWORD}
          roles:
            - detect
        - path: rtmp://192.168.0.152/bcs/channel0_main.bcs?channel=0&stream=0&user={FRIGATE_CAM_USER}&password={FRIGATE_CAM_PASSWORD}
          roles:
            - rtmp
            - record
    detect:
      width: 640
      height: 480
      fps: 4
    objects:
      track:
        - person
        - car
      filters:
        car:
          mask:
            - 0,166,0,480,206,480,412,340,386,286,160,154
            - 172,95,152,133,220,159,290,135,248,79
    motion:
      mask:
        - 0,0,640,0,640,114,574,107,491,73,309,70,0,141

  FrontDoor:
    <snip>

  Backyard:
    <snip>

  LivingRoom:
    ffmpeg:
      inputs:
        - path: rtsp://{FRIGATE_CAM_USER}:{FRIGATE_CAM_PASSWORD}@192.168.0.135:554/cam/realmonitor?channel=1&subtype=1
          roles:
            - detect
      input_args: -avoid_negative_ts make_zero -fflags nobuffer -flags low_delay -strict experimental -fflags +genpts+discardcorrupt -use_wallclock_as_timestamps 1
    detect:
      width: 640
      height: 480
      fps: 5
    record:
      enabled: false

ffmpeg:
  input_args:
    - -avoid_negative_ts
    - make_zero
    - -fflags
    - nobuffer+genpts+discardcorrupt
    - -flags
    - low_delay
    - -strict
    - experimental
    - -analyzeduration
    - 1000M
    - -probesize
    - 1000M
    - -rw_timeout
    - "5000000"

record:
  enabled: true
  retain:
    days: 10
    mode: all
  events:
    pre_capture: 3 # seconds
    post_capture: 5 # seconds
    retain:
      default: 10 # days
There’s a lot going on here but the basic idea is that you configure your detectors, your MQTT user, the camera feeds, and some other optional stuff.
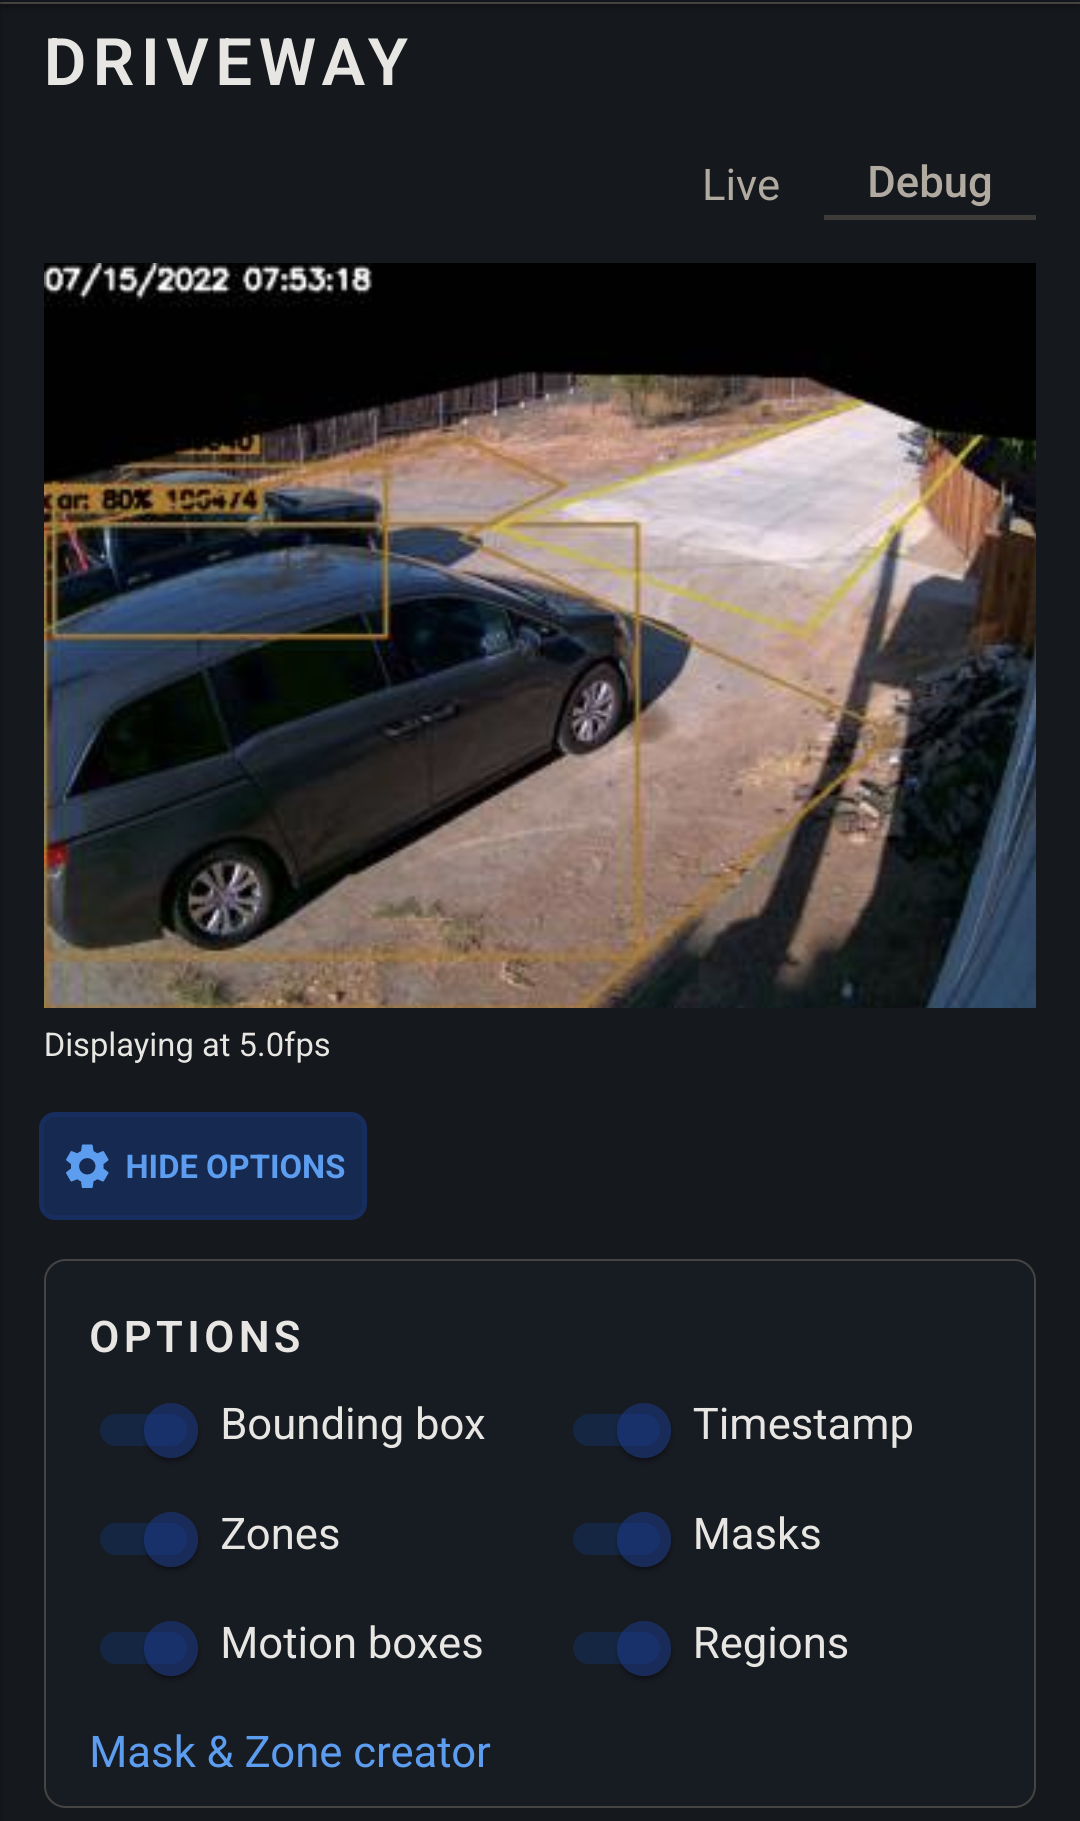
Camera Config
This is the meat and potatoes of the config file. At minimum you need to configure a camera name, the path to the stream of your camera, and what roles that stream will provide.
You’ll notice that my first camera has two inputs configured. A lot of motion-detecting IP cameras actually stream two separate feeds of the same video. One at high resolution which is used for monitoring and recording and one at lower resolution used for detecting motion. Frigate can use the lower resolution stream for object detection as well. You’ll want to do this as running object detection on 4k video will be very processor intensive and will not really gain you any benefits. The machine learning voodoo/witchcraft can detect objects on a 640x480@4 FPS stream just fine. This is what the detect section is for. You’ll need to configure the resolution and framerate of the low res stream to match what your camera is sending.
So basically Frigate is monitoring the low resolution stream for motion. When it picks some up, it runs object detection on that area of the video. If an object is detected, it will begin recording on the high resolution stream until the object is lost. Neat.
The objects section has a list of all of the objects I would like that camera to track. By default, it’s only people but this is a driveway camera so I’d like to know if there are cars coming down the driveway. Maybe it’s the Amazon man with new toys.
But I also don’t want my camera recording every time a car drives by on the street. You can configure mask zones which will ignore the specified objects within that zone. There’s a feature within the web app for setting this up and it’s documented here. It’s a bit clunky since you have to copy and paste the mask coordinates from the web app into your config file. But I think the developer doesn’t want the app to have write access to config.yaml and I can’t blame him for that.
Finally, there’s a motion zone which will also ignore any motion in a certain area.
ffmpeg Config
You’ll notice that some custom args are passed to ffmpeg as well in the ffmpeg section. These are the default args that will be passed to all cameras unless they are overridden on a per-camera basis. I pulled all of these from the Frigate docs as they had a section specifically for my cameras.
Three of my cameras are all the same brand so they will all use the same ffmpeg args. The last cam (Indoor) is the Amcrest camera and is configured to use different ffmpeg args. I pulled these from the docs as well.
Record Config
The record section is also where you control recordings. retain determines how long video is stored on your hard drive. You’ll want to make sure the time is short enough that you don’t fill up your disk. For reference, I have a 2TB HDD dedicated to storing Frigate video. With these settings, I’m sitting right at about 90% of my disk capacity. You are also able to configure how much time to capture before and after an event occurs. There’s another retain section here as well. Why?
Well, by default, if record is enabled, the cameras will record 24/7. So the first retain section determines this. In the events section, you will also configure how long events are stored.
Integrating with Home Assistant
Now that both Frigate and Home Assistant are running, we need to make them talk to each other. I won’t go too much into this but there are a few options depending on how you installed Home Assistant. If you used Docker, then you probably will have to go the HCAS route. HCAS is a third party add-on store for Home Assistant that allows you to install and manage… add-ons. This part is kinda boring so I’ll direct you to the Github repo for the integration.
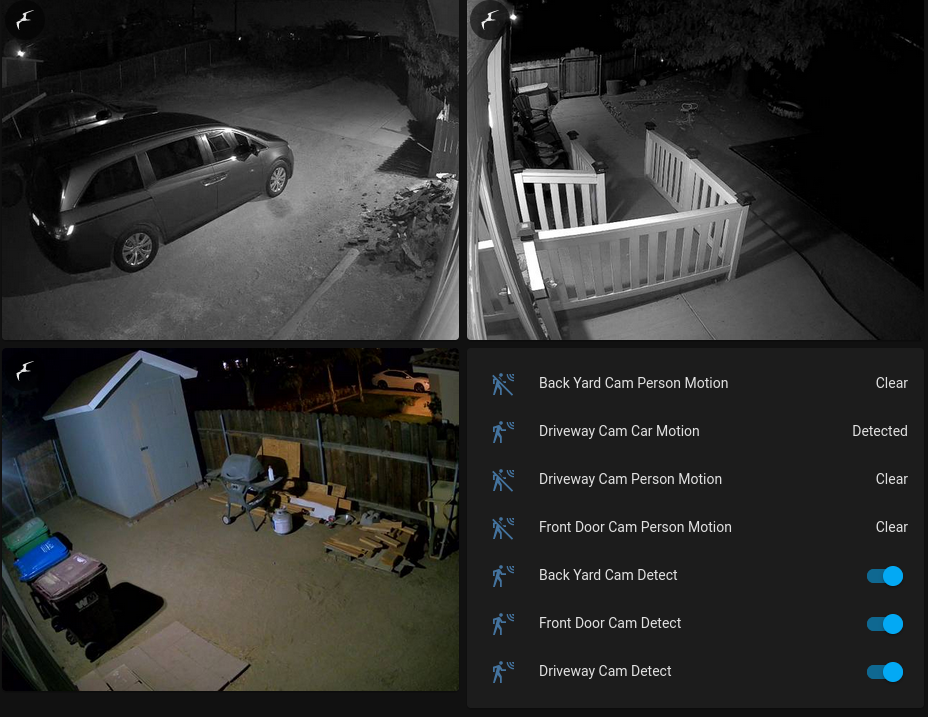
This integration provides a new dashboard card for viewing your cameras as well and this can be used to create a birdseye view of all of your cameras.
Notifications
Now this is the part that makes me most happy with my setup. Smart notifications. When an object is detected, not only am I notified about it, but the notification will also include an image of what the cameras saw. So the time between the cameras picking something up and me seeing what it was is now something like 1-3 seconds. Much less frustrating this way. Now, instead of waiting for the video stream to buffer while I’m wondering if there are armed assassins running down my driveway, I can just take a quick glance at my phone and see that the Uber Eats guy is here and I can lock my safe back up.
This is where the Home Assistant integration will really come in handy. Using a slick blueprint, I get all this fancy niceness quite easily. I actually forked this blueprint to make the notifications a bit more succinct so they’d appear on my Garmin watch without being truncated. You can use the blueprint by creating an automation with it and choosing which camera will notify and under what conditions (e.g. you are away, car enters a certain region).
Summary
I tried to keep this as straightforward as possible to explain the process for setting up a locally-hosted yet better than off-the-shelf camera system at home. I’m always tweaking this thing and finding newer, better ways to set things up. Frigate is still going through a lot of changes so new features are coming along quite often.